Advanced Serial Data LoggerTrust In Confidence! For Windows 2000 - Windows 11 (2022) (incl. Server, x86 and x64). Latest version: 4.7.7 build 417. April 17, 2024. Write data to a CSV text fileDownload a Free Trial Version. It allows you to try all features! Plugins can be downloaded separately here
Task: We should create other ASCII file with different structure in the CSV format. Requirements:
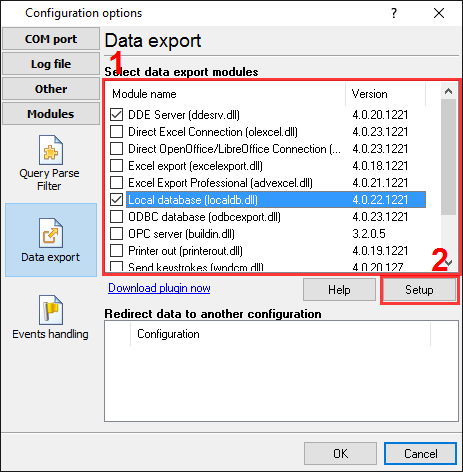
It is assumed that: You've prepared parser items for export. For this tutorial, all items were prepared in the previous part. Also you may read other examples of data parsing (different parser types) Solution: All parser items are ready for export. Now we should configure the Local database plugin. This process is straightforward. Please, open the configuration window of the Local database plugin (fig. 2) by selecting the module in the list and clicking the "Setup" button on the "Data export" tab (fig. 1).
You should:
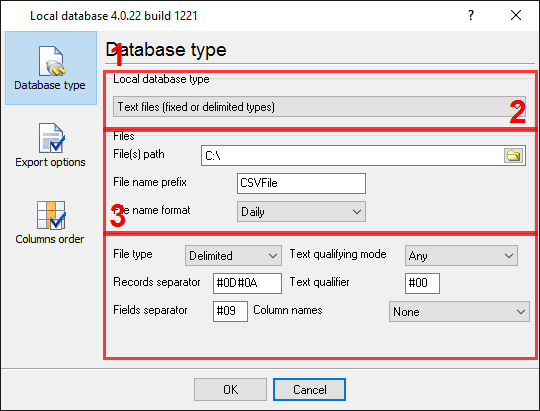
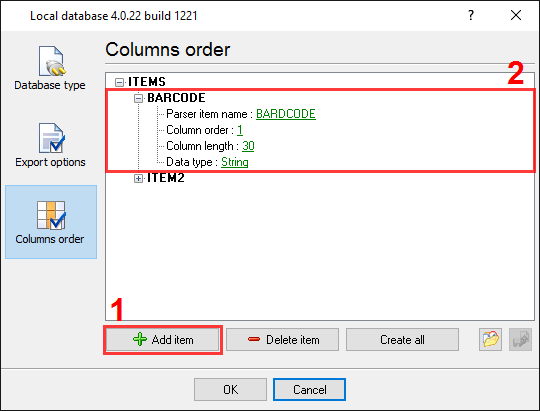
On the "Data formats" page, you can specify a data format of your data. Because all our variables are with the "string" data type, we don't need to change format options. On the "Columns order" page (fig.2), you can specify how variables will be placed in a spreadsheet. Because we need two variables only, therefore, we need to create two items on this page by clicking the "Add item" button (fig.2, pos.5).
Before adding an item, the program will ask you about an item description. You can type any characters here, which will help you to remember a variable's content. Each data export item has the following properties:
Please click the "OK" button and close the configuration window of the "Local database" plugin. Then click the "OK" button in the options window. Ok. All settings had been configured, and we are now ready to capture barcodes. Related articles:
|
|
| Copyright © 1999-2024, AGG Software. All rights reserved. Terms of use | Privacy policy |