Advanced OPC Data LoggerTrust In Confidence! For Windows 2000 - Windows 11 (2022) (incl. Server, x86 and x64). Latest version: 3.10.1 build 417. April 17, 2024. OPC-ODBC bridge. Inserting OPC data to the MS Access database through ODBCObjective: Several OPC tags are to be controlled and recorded to a database. Each variable is to be put in its own column. A table in the MS Access database has the following structure:
This table structure is convenient with a small number of variables that are to correspond with a certain timestamp. Requirements:
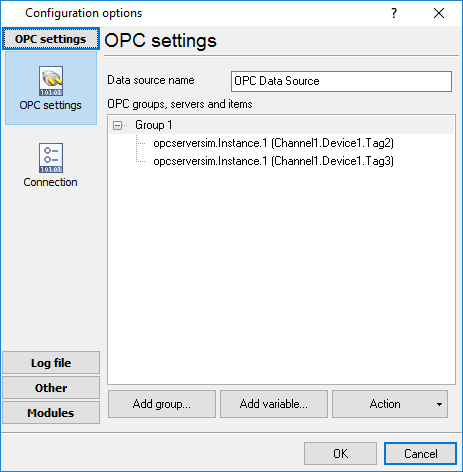
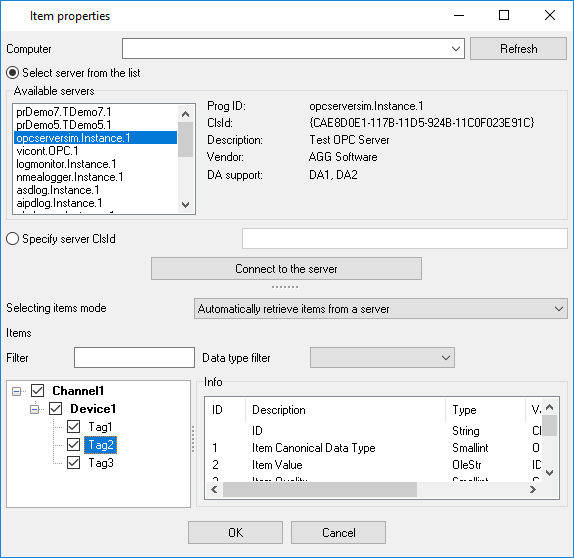
Assumptions: You have worked with OPC servers already. You can establish a connection between an OPC client and an OPC. You know how to browse the server's address space and select OPC tags. Solution: We need to add our variables to our OPC logger. We need to add the configuration to the application if you haven't done that earlier. To create a configuration, use the button with the plus in the application's main window. In the dialog window that appears, go to the "OPC Settings" tab (Fig.2).
On this tab, we need to create:
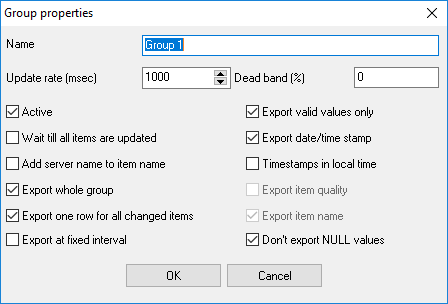
If the "Active" option is enabled, data is gathered from the OPC server and exported. If the "Export whole group" option is enabled, data from the entire group is exported simultaneously. If the value of the variable has changed, exported is the new value; otherwise, exported is the previous value from the internal buffer. That means that each column in the database will have its own value. If this option is disabled, the data can be recorded in the database as four columns (which are selected with additional options):
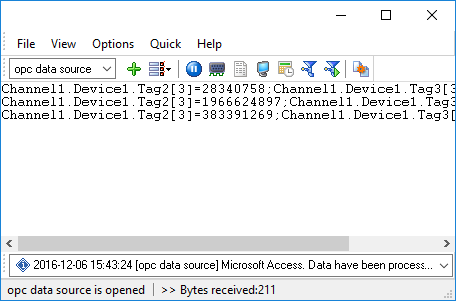
Example of data in the application's main window if the option is enabled:
Example of data in the application's main window if the option is disabled:
All variables have the same name:
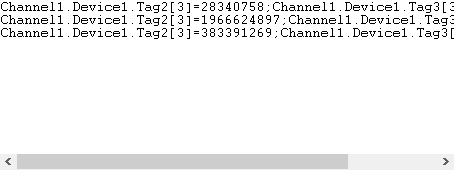
In this example, we need to export each OPC variable to its own column. Therefore, the "Export whole group" option must be enabled. As a result, after the variables have been updated, we will see the data to be exported in the application's main window (Fig.5).
Figure 5 shows the structure of the data being exported. Each value contains three parts:
If the "Export one row for all changed item" option on figure 3 is enabled, the data will be exported as a single line, as shown in figure 5. This option is mandatory when exporting to a database. If this option is disabled, the data will look as follows:
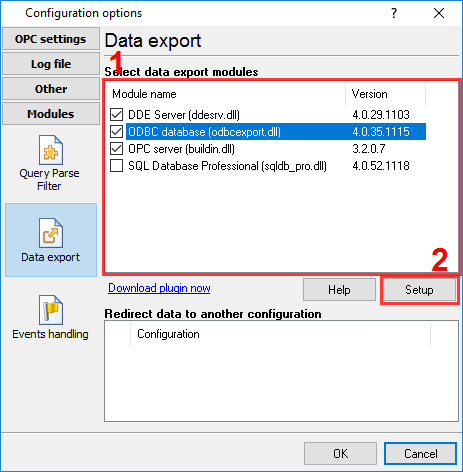
I.e., only changed values are exported; each variable is exported as a single line, which is convenient for reading and writing to a log file. Now we need to configure exporting data to a database. For that, go to the "Modules-Data Export" page (Fig.6)
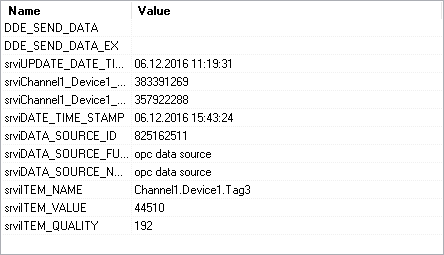
Here you can activate the DDE server module to make sure that the data is ready for exporting. Activate the module on the list and then click "OK" to apply changes. Then open this page again and select the DDE server module on the list and then click the "Configure" button. In the window that appears, the "Active items" tab should display the variables that were added earlier (Fig.7).
Now we need to configure the "ODBC database" data export module for inserting data to a Microsoft Access database. Activate this module on the list (Fig.6) and then click the "Configure" button.
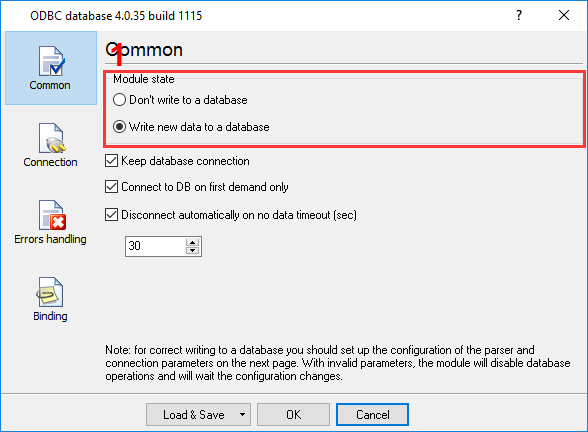
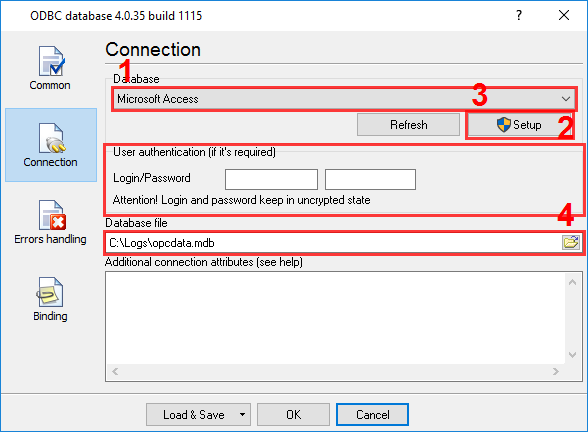
Activate the options shown in figure 8. These options include writing to a database; with that, the connection with the database will be permanent and will be established only during the first time it is necessary. On the first page (Fig.9) do the following:
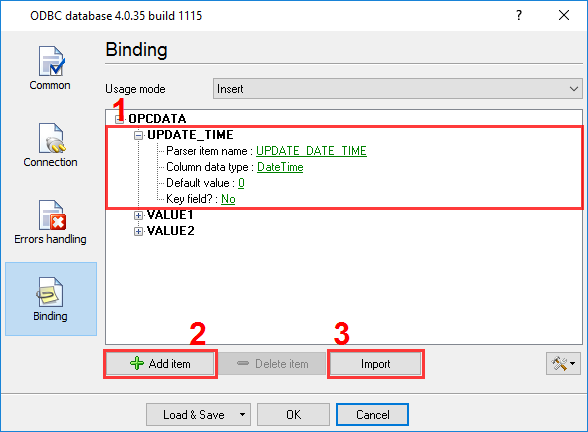
Next, you need to "bind" the name of the OPC variable with the column's name in the table. You can do that on the " Binding" tab (Fig. 10).
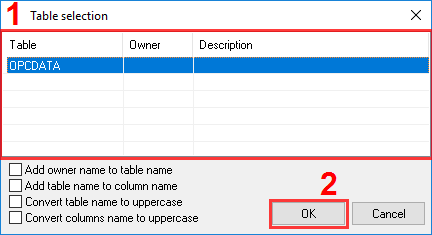
Before you "bind" the variables and the columns, you will need to import the description of the table from the database or compose it manually by clicking on the "Add" button for each necessary column. But it is much simpler to import a description by clicking "Import" (Fig.11).
To import a table description:
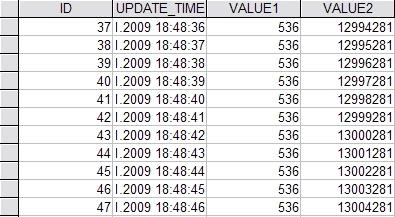
Click "OK" in all dialog windows to apply changes. If everything is configured correctly, the application's main window will show the messages on the successful export of data (Fig.12) (if the protocol is activated in the application's settings), and the data will be inserted into the table (Fig.13).
An archive with a test OPC server, database and software configuration can be downloaded here. To use the files from the archive:
Related articles:
OPC and DCOM Configuration on Windows 2008 and Windows 7
OPC and DCOM Configuration on Windows 10, 11, Windows Server 2019, 2022
Read more about:OPC Logger RS232 pinout and signals Cables and signals Data monitor cables |
|
| Copyright © 1999-2024, AGG Software. All rights reserved. Terms of use | Privacy policy |