To start working with the program, you should make several simple steps.
1. Adding a tab
Select the "Edit" - "New Tab" menu item. Use the new dialog box to specify the tab parameters (fig.1) and click the "OK" button. A new tab will be added in the program (fig.2).
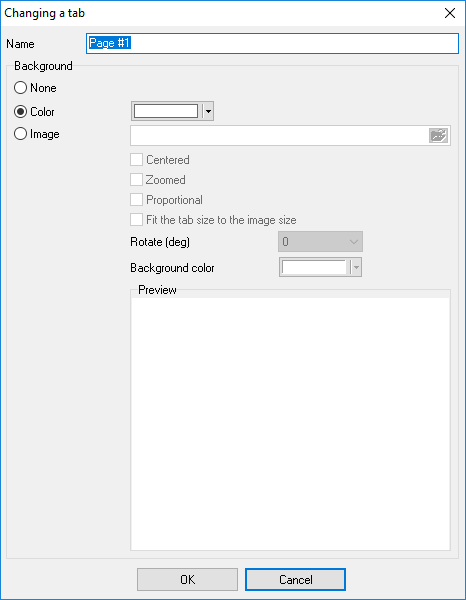
Fig.1. Adding a new tab

Fig.2. New tab
2. Adding a visualization block
Select the "Edit" - "New Block" menu item. Move the mouse pointer over the unoccupied area of the new tab (fig.3) till you see the mouse pointer turns into the cross. Hold down the left mouse button and specify the borders of the visualization block
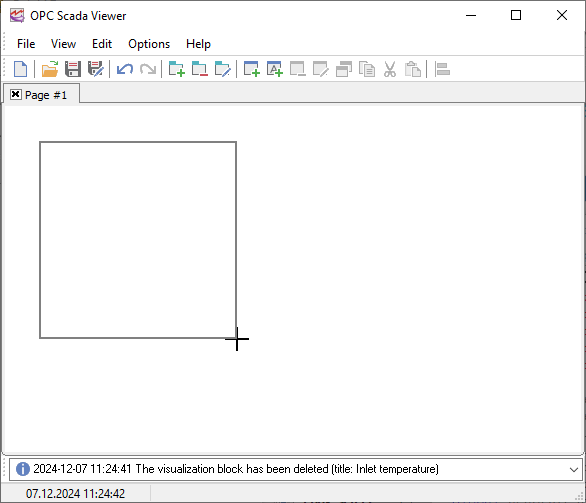
Fig.3. Creating a new visualization block
3. Selecting an OPC tag
When you release the left mouse button, the Visualization Block Parameters dialog box will be opened (fig.4). Switch to the "OPC tag" tab in this dialog box. Click the "Select a tag from the server" button on this tab.

Fig.4. OPC tag parameters
1.Use another dialog box (fig.5) to enter the computer name where the OPC server is running. If the server is located on the same computer where the program is running, leave the field with the computer name empty;
2.Click the "Update" button;
3.Select the server from the list;
4.Click the "Connect to the server" button;
5.Select the tag from the list;
6.Click the "OK" button.

Fig.5. Selecting an OPC tag
After you click "OK", the information about the tag must appear on the "OPC tag" tab in the Visualization Block Parameters dialog box (fig.6).
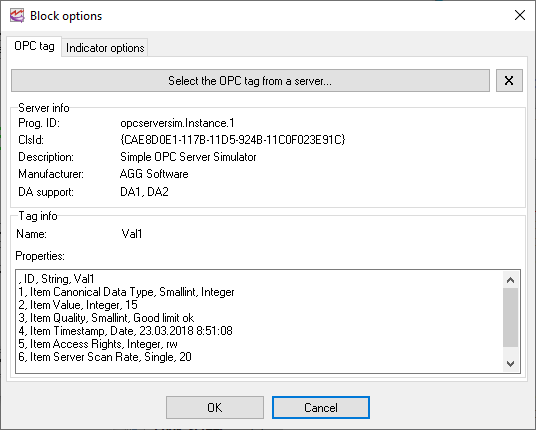
Fig.6. Information about the selected tag
4. Activating a connection
Switch to the "Connection" tab and make sure that the "Active" option is enabled.
5. Configuring the display parameters
Switch to the "Display Parameters" tab. You can configure a lot of parameters on this tab. At least, you should select and configure the indicator for the selected tag (fig.7). To do it:
1.Select "Indicator" from the "Element" list;
2.Enable the "Show" option;
3.Select the indicator type;
4.The appearance of the indicator will be shown in the preview window;
5.Use the parameter tree to configure the indicator parameters, if necessary;
6.Click the "OK" button to save all changes.
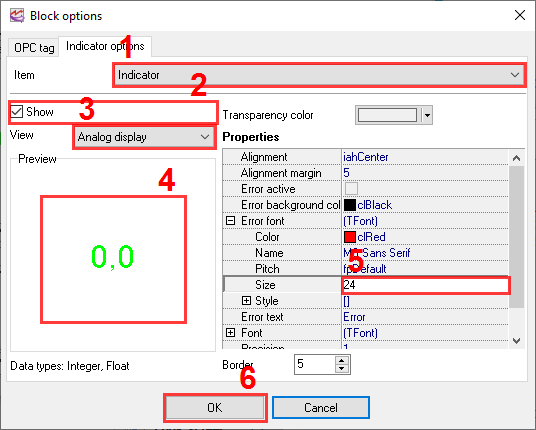
Fig.7. Indicator parameters
After you save changes, the corresponding block will appear on the tab (fig.8).
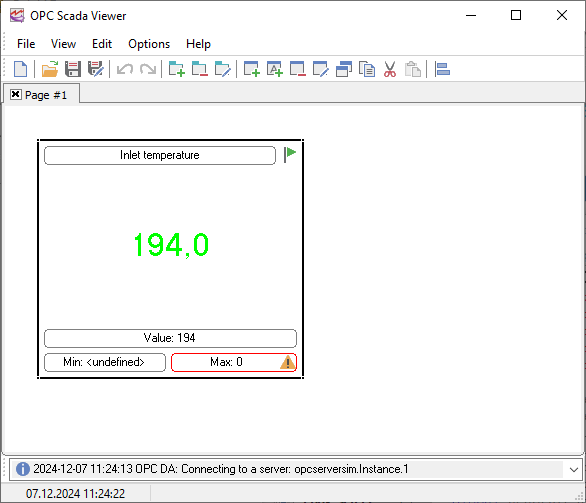
Fig.8. Working visualization block
This way you can add an unlimited number of blocks and get the operating monitoring window, as shown in fig.1 in the "Introduction" section.