The printer list is necessary for the program to follow expenses on printing and to calculate its cost.
To create the list of printers for monitoring, select the "Printers" page on the navigation bar (fig. 8)
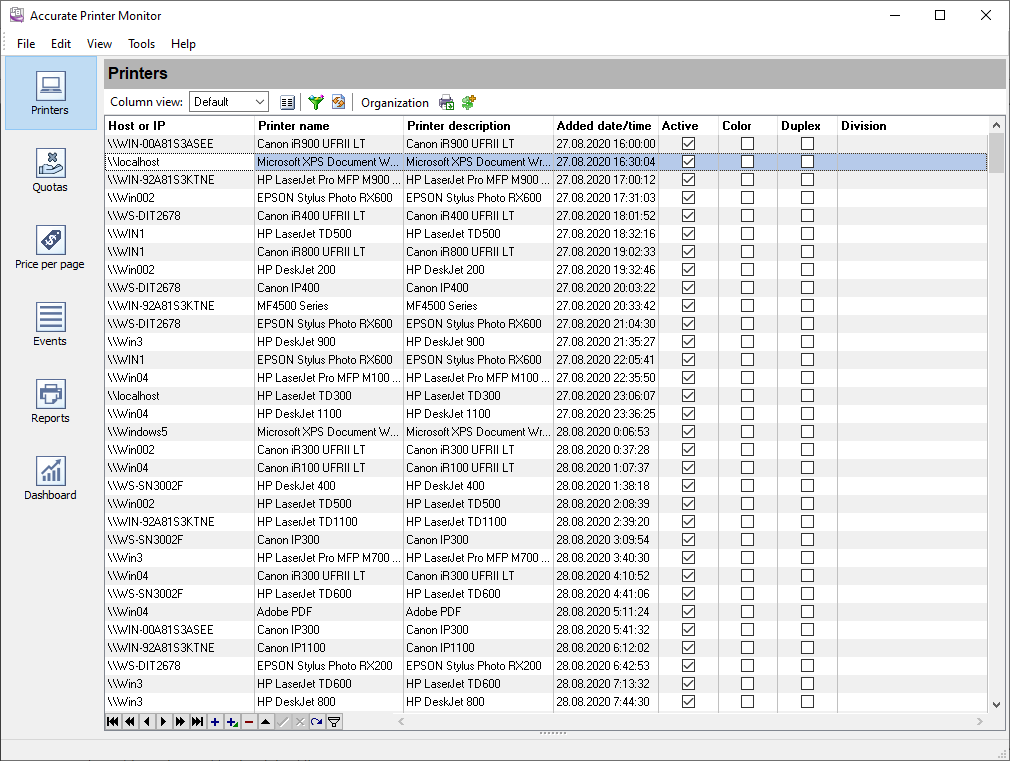
Fig. 8 Printer list
You should create your printer list in the upper table and specify the printing cost for each of them in the lower table. The program can offer you several ways to speed up the process of creating the list.
Printer list
If the logger configured earlier has already been collecting data for some time, you can create the printer list by importing this information from the event table. To do it, click the ![]() button on the toolbar. Select the printers you want to add in the new dialog box (fig. 9). The printers already added earlier will be disabled in the list.
button on the toolbar. Select the printers you want to add in the new dialog box (fig. 9). The printers already added earlier will be disabled in the list.

Fig. 9 Printer import
If you are going to take the cost of printing into account, it is recommended to specify the default cost for the selected printers. To do it, click the link in the hint and specify the cost of printing color and black-and-white pages in the new dialog box (fig. 10). It will rid you of the routine of compiling a large list of printers. The default cost will be used for any page size and print type until you specify additional conditions. You will be able to add and change the cost of printing for each printer later.
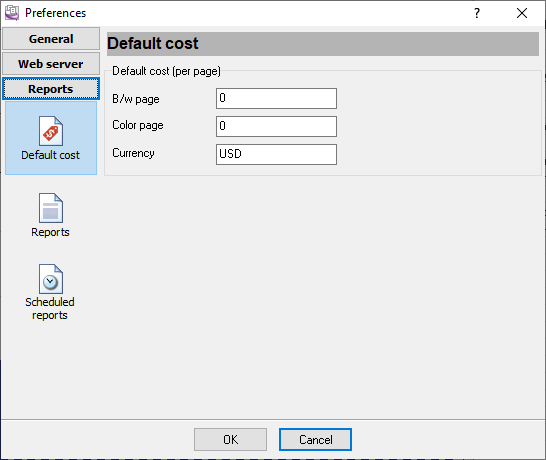
Fig. 10 Default print cost
After you select printers in the list, you should click the "Add" button. The selected printers will be added to the table, and the default cost will be added for each printer.
Printer list optimization
If you have several printers of one type installed on several print servers and the print cost is the same on all of them, you can considerably reduce the printer list using the special mask character "*".
Example: The "Adobe PDF" virtual printer is installed on all office computers. Printing on it does not cost anything. To avoid specifying this printer for each computer, just set the value in the "Host or IP" field to * and set the printing cost for this printer to 0 (fig. 8). Now the program will automatically use this value for the Adobe PDF printer on every computer.
Example 2: The printers "Epson Stylus Photo RX600" and "Epson Stylus Photo RX500" are installed on the print server PRN1 and PRN2. They can print only A4 pages. The cost of printing is the same on both computers. So it is enough to add an entry to the printer list where:
1.The hostname or IP is set to PRN*
2.The printer name is set to Epson Stylus Photo RX*
Specifying the print cost
If the printer is used to print only black-and-white documents on paper of one format, you can use the default cost. Suppose the printer can print various documents like most Inkjet printers. In that case, it is recom-mended to specify the price for various types of documents to calculate the cost of printing more precisely.
To specify the cost of printing, select the necessary printer in the "Printer" column, and specify one or more costs for different print options (fig. 11)
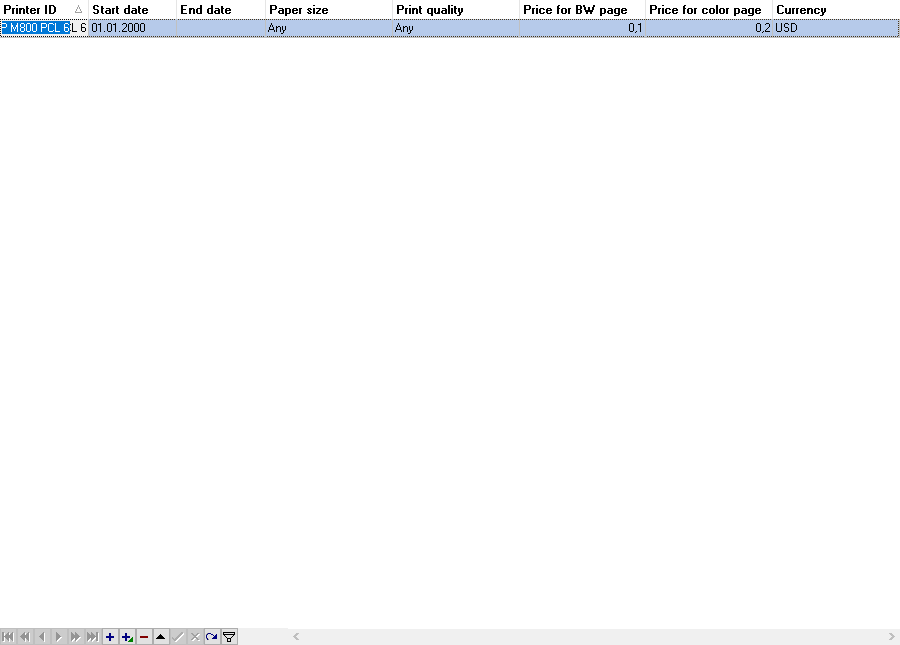
Fig. 11 Print cost
1.The start date when the cost becomes active is specified in the "Start date" field.
2.The end date when the cost becomes inactive is specified in the "End date" field. If the terms are not defined for this cost, you can leave this field empty.
3.Select the paper type from the list in the "Paper size" field.
4.Select the print quality in the "Print quality" field. Quality > 2000 dpi corresponds to photo-quality printing.
5.Specify the cost of one black-and-white page in the "Price for BW" field.
6.Specify the cost of one color page in the "Price for color" field.
7.Specify the currency in the "Currency" field.
The program searches through all operational costs. It selects the most appropriate print cost for each separate print job.
If you need to specify a print cost for several printers in the list, the program offers you a comfortable way to do it. Select the necessary printers in the table and click the ![]() toolbar button. You will see the "Add cost" dialog box (fig. 12).
toolbar button. You will see the "Add cost" dialog box (fig. 12).
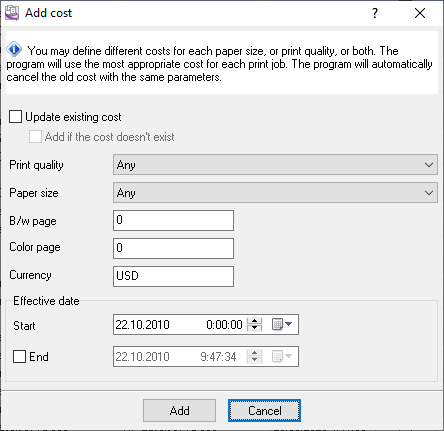
Fig. 12 Adding the cost
You should specify the same print parameters as in the table above. After you click the "Add" button, the program will add the specified print cost for all selected printers.
If there is already the print cost with the same parameters (page size and print quality), the program will automatically set the end date for the old cost.
If you enable the "Update existing cost" option, the program will replace the old print cost with the same parameters. It may be helpful if you do not want to keep the history of print cost changes.