Advanced PBX Data LoggerTrust In Confidence! For Windows 2000 - Windows 11 (2022) (incl. Server, x86 and x64). Latest version: 3.7.7 build 417. April 17, 2024. Use Advanced PBX Data Logger as middleware between a PBX and another information system (PMS or CRM)ProblemWe have a PBX that can provide call data records (CDR) via Ethernet (IP address and port), but our hotel PMS (property management system) can receive data via RS-232C only, and only in a specific format. Can the logger work as a middleware between the PBX and the PMS and convert data and interfaces in real time? Preliminary requirementsTo solve this problem, you have to use Advanced PBX Data Logger Enterprise or its trial version. You need to download and install the following additional modules (if you haven't done it yet):
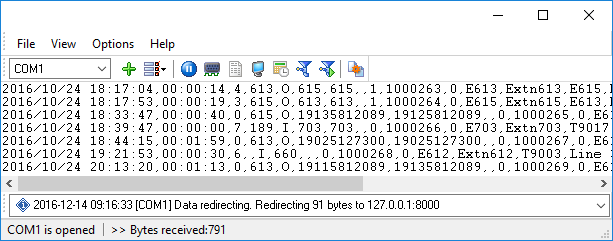
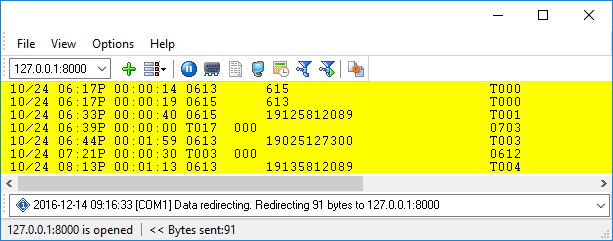
SolutionIn this example, data are received via the RS232 (COM) port and redirected via Ethernet. This system can handle other interface combinations: Ethernet to COM, COM to COM, a file to COM, etc. You only need to create a data source of the specific type at the appropriate step. Step 1Create a configuration to receive data from the PBX. In this example, we are going to create a configuration with an RS232 data source. To create the configuration, click the "Green Plus" button in the program's main window. The configuration will receive data from the PBX, break down data packets into components, and generate data packets in the new format. Make sure that the data received are displayed in the program's main window.
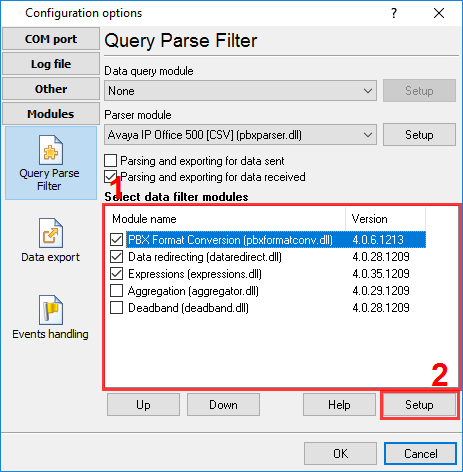
Step 2You need to select a parser for the PBX and activate the data filtering modules. Parser – Select your PBX in the list. Click the "Setup" button next to the parser name to configure additional parameters for the parser (for example, the date and time format). Some parsers do not have any settings. Note that if the parser couldn't process the data received from the PBX (for example, because the parser does not support the specific format), the data will not be redirected. Data filtering modules – You need to enable the modules shown in Figure 2, and arrange them in the specified order by clicking the "Up" and "Down" buttons.
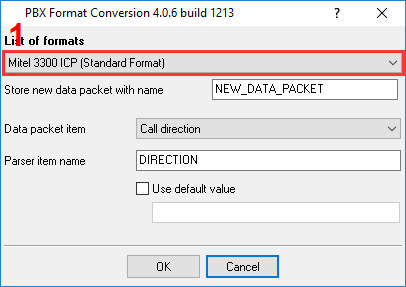
Step 3At this step, you need to configure the "PBX Format Conversion" module. The module will generate a new data packet from the data prepared by the parser. Select the module in the list and click the "Setup" button.
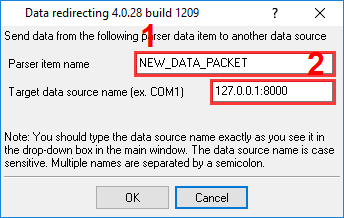
In the module settings window, select the target data format in the "List of formats" list. You don't need to change any other settings. The default ones should work fine. Click the "OK" button to save the settings. Note that it may be impossible to convert data without any loss between very different PBX data formats. Some data may have to be dropped, long values may have to be truncated, and some fields may have to be zero-padded. Step 4At this step, you need to configure the "Data Redirecting" module. This module will send the new data packet generated by the previous module through another data interface. To configure the module, select it in the list (Figure 2) and click the "Setup" button.
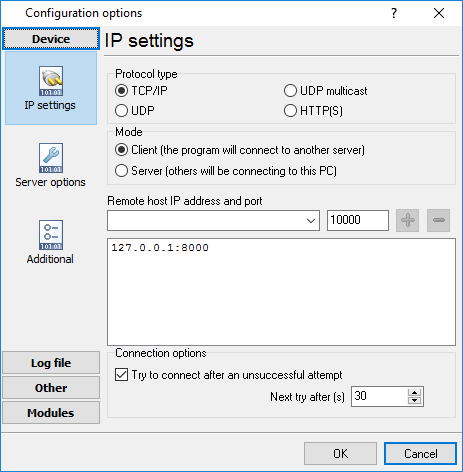
Enter the name from the previous module's settings in the "Parser variable name" field. This variable contains a data packet to be redirected through the other data interface. Enter the target data source identifier in the "Target data source name" field. If the target data interface is Ethernet, specify the IP address and port, as shown in the figure. If the target data interface is an RS232 or other virtual port, or a real COM port, specify the COM port name (for example, COM1 or COM2). Click the "OK" button to save the settings. Step 5You need to create a new configuration that will be the target data source. The data will be transferred through that data interface to the target information system. To create the configuration, click the "green plus" button in the program's main window and select the necessary interface type. In this example, the second data source is Ethernet (TCP/IP). Configure the following in the newly created configuration:
You don't need to configure any other settings.
Step 6You need to check how the middleware works.
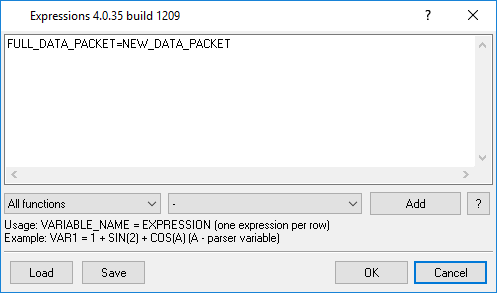
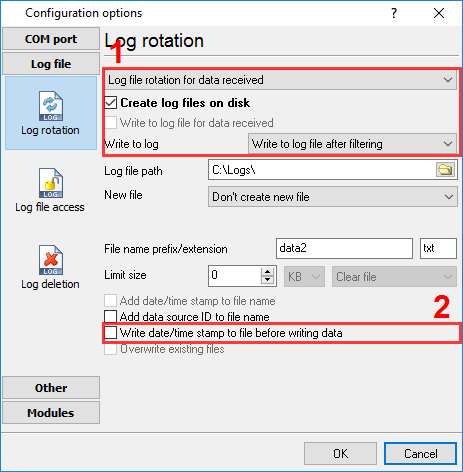
If the target system can read CDR only from a file, do the following:
FULL_DATA_PACKET=NEW_DATA_PACKET
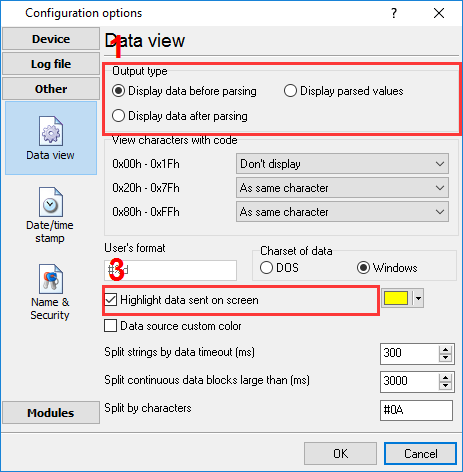
Note that data intended for the log file must be filtered first, and you also need to disable writing additional data to the log file. You can also specify the desired filename, file extension, folder, and creation mode for the new file. These settings may depend on the target information system. Related articles:
Read more about:Call logging Call accounting SMDR to SQL SMDR Listener Cables and signals |
|