SNMP Data LoggerTrust In Confidence! For Windows 2000 - Windows 11 (2022) (incl. Server, x86 and x64). Latest version: 2.10.6 build 417. April 17, 2024. Printer status monitoring via SNMP to ExcelProblem: All modern printers with a TCP/IP port allow monitoring of the printer's status using the SNMP interface. There is a wide range of values (e.g. color and tray level, uptime, statuses, etc.), but each manufacturer may implement the limited and necessary set of values. This 'how to' shows how to automate data reading from several printers and collect data in Excel in real-time, where one row in Excel contains all values for one printer. The program overwrites values in that row with the latest values. You can see the resulting XLSX file example for color Canon printers. FYI: We use a data example from Canon or Zebra printers in this article. Preliminary requirements:
Solution: Configuring SNMP data source1. Click the "Plus" button in the main window and add separate data sources for each printer type:
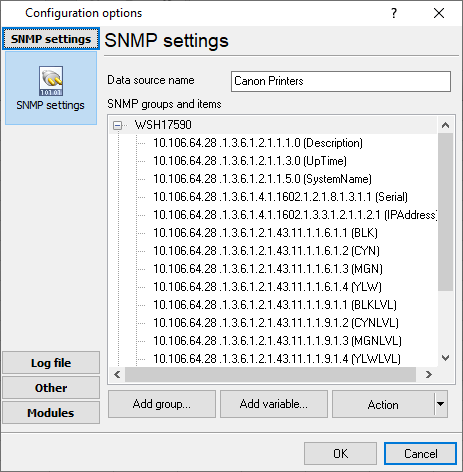
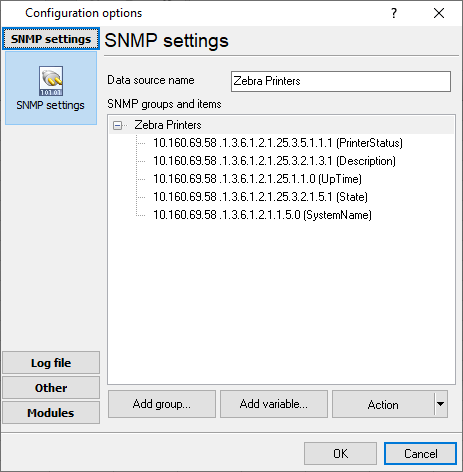
2. When you add a new group for SNMP printer values, you should use the following settings:
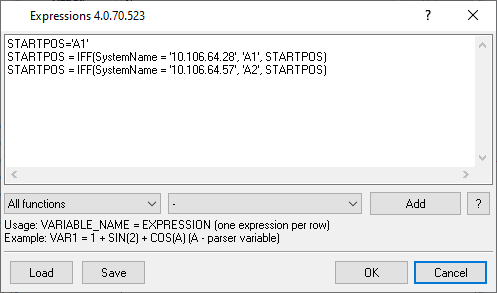
Preparing SNMP data2. We should always write data for a specific printer to one fixed row. Therefore, we should have some rules to define a start cell in Excel. We can use the Expressions plugin for this task and use a printer's IP address to distinguish data rows for different printers.
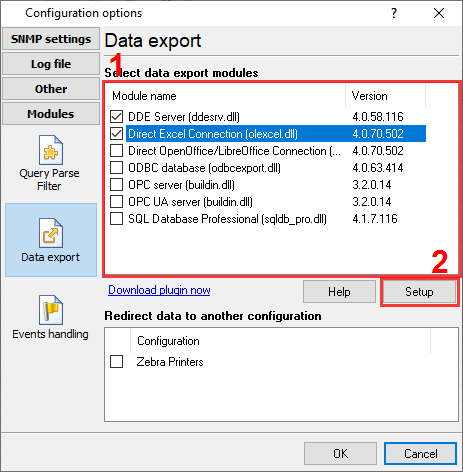
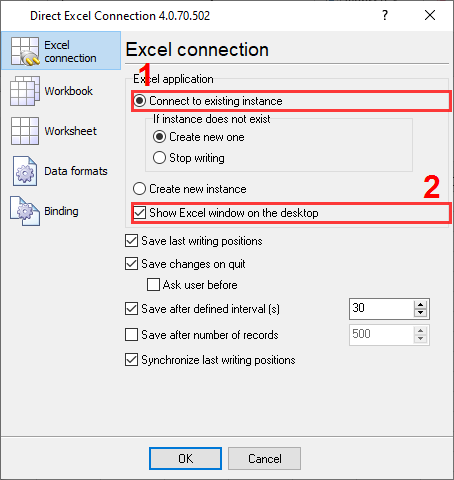
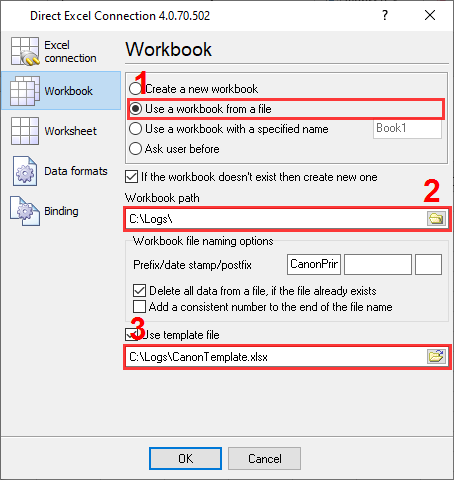
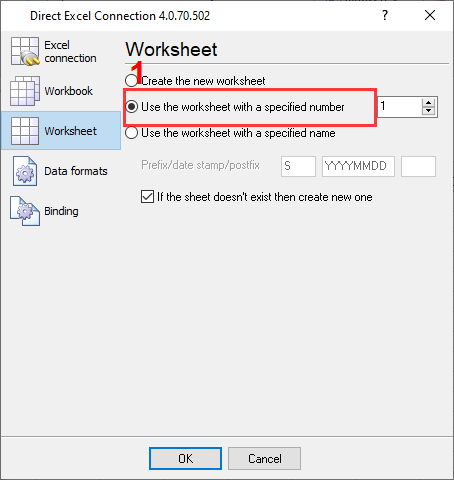
Exporting SNMP printer data to Excel3. Enable the "Direct Excel Connection" plugin and configure destination file options. This example uses a template with column headers for all new files.
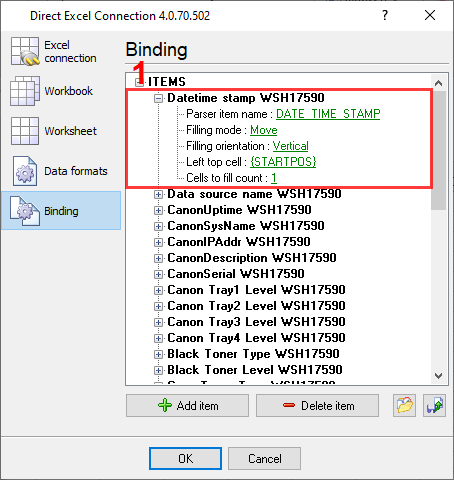
4. Bind SNMP printer status values to Excel columns. Here, you can assign SNMP printer values to the necessary column. The start cell for the first value is defined as a placeholder for the calculated value from the Expressions plugin. For all other values, we use relational positions by selecting "Last write cell+NNN" as "Left top cell".
8. Finally, you download a configuration example (load it in the File menu in the main window), or visit the following tutorials about exporting parsed data to other targets like a database, OPC, CSV, DDE. Related articles:
Read more about:SNMP Data Logger RS232 pinout and signals Cables and signals Data monitor cables |
|