
Yeastar MyPBX Enterprise SMDR setup and CDR format
This page shows how to get call records out of the Yeastar MyPBX Enterprise into Advanced PBX Data Logger: the connection settings, the parser to select and the 15 fields the logger extracts for reports or a database. The settings apply to our logger; other call accounting software may expect a different configuration.
Quick facts
| Item | Yeastar MyPBX Enterprise |
|---|---|
| Interface | Serial printer port or LAN, whichever the system uses for SMDR output. The record layout identifies the format. |
| Parser to select | Yeastar MyPBX Enterprise |
| Fields extracted | 15 |
Customized configuration
Introduction
The system configuration files included asterisk configurations are stored into database first and then logistically generated by the background applications. If you would like to manually modify the configurations in /etc/asterisk/, the configuration file will be updated when customers apply the changes on WEB GUI next time. Reboot the device will result in the update of configuration file as well. Namely, the customized modifications by clients can't be saved successfully.
Solution
If you want to save the user-defined data, you must save it to the database. In the directory of "/persistent/var/lib/asterisk/db/", you may find a directory "custom-cfg" to store user-defined data. You should place an appropriate configuration file under this directory. Modified data must saved in "/persistent/var/lib/asterisk/db/custom-cfg/manager_custom.conf".
Step 1
1. Go to WEB GUI → Network Preferences → LAN Settings.
2. Enable SSH temporarily.
3. Remember the SSH port number.
4. Save and apply the changes.
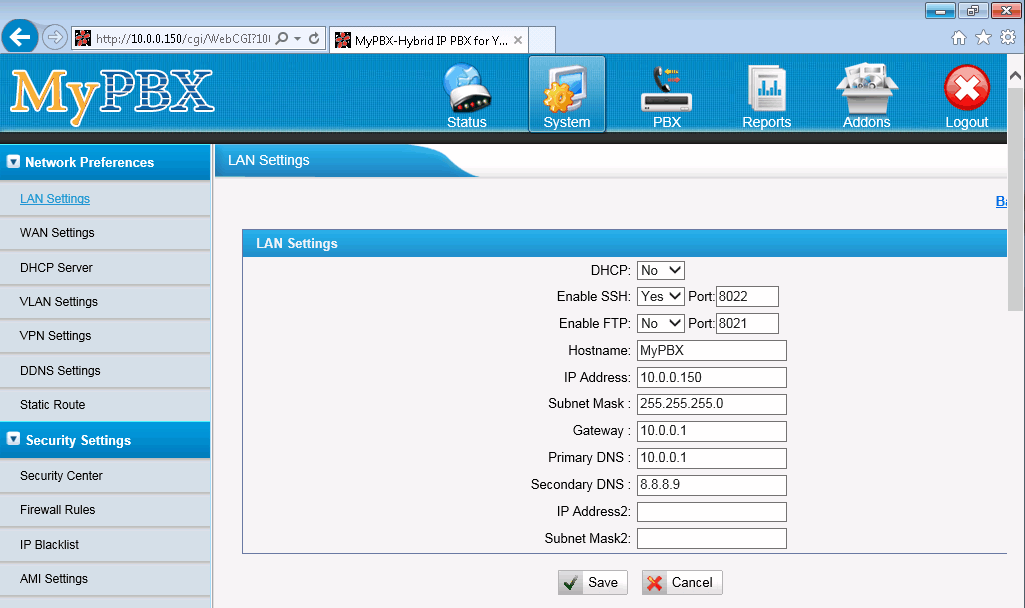
Step 2
1. Go to WEB GUI → Security Settings → AMI Settings.
2. Specify the user name: ami (you may change the user name, but remember it. It will be used below).
3. Specify any strong password.
4. Specify the permitted IP address and subnet mask. This is the IP address of the computer with Advanced PBX Data Logger. Therefore this computer must have the static IP address. Only the specified computer can use the AMI interface.
5. Save the changes, but do not apply the changes yet.
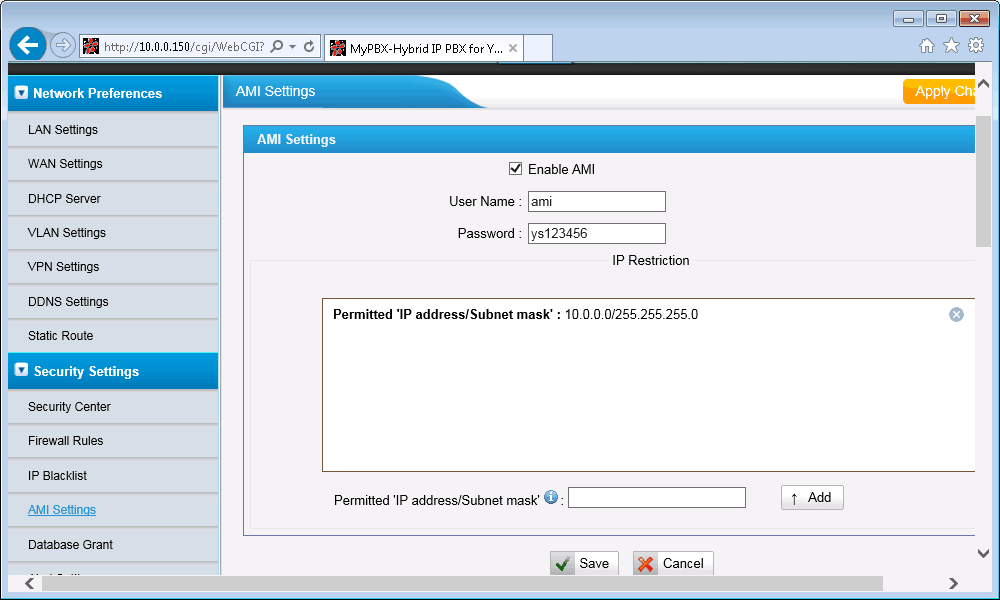
Step 3
1. Open any telnet utility with SSH support. We recommend to use PuTTY.
2. Connect to your PBX. Use your PBX IP address and the SSH port from "Step 1".
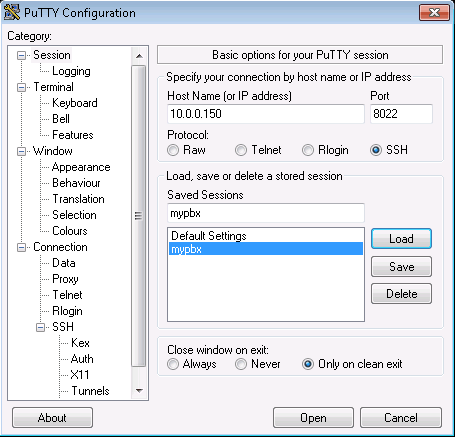
3. Login as root. The default password for root is ys123456.
4. Type in the command prompt cd /persistent/var/lib/asterisk/db/custom-cfg/ to change the current directory.
5. Type in the command prompt vi manager_custom.conf to open a simple editor.
6. In the editor you must add 2 new rows (see below). Note: you must specify the user name from "Step 2" in the square brackets.
[ami]
read = all
7. Press the <ESC> button and type :wq to save the changes. The corresponding file must be on the PBX.
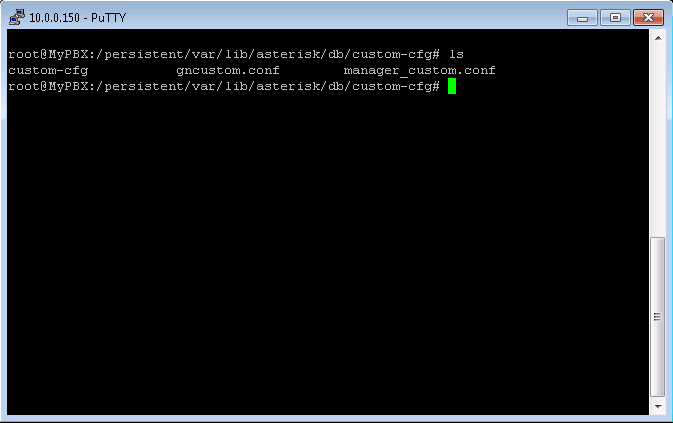
Step 4
1. Go to WEB GUI → Network Preferences → LAN Settings.
2. Disable SSH.
3. Save and apply the changes.
PBX Data Logger Settings
1. The logger should work in TCP client mode. The PBX being in permanent listening on port 5038, therefore you need to specify x.x.x.x:5038, where x.x.x.x should be the IP address of your PCX (e.g. 10.0.0.150).
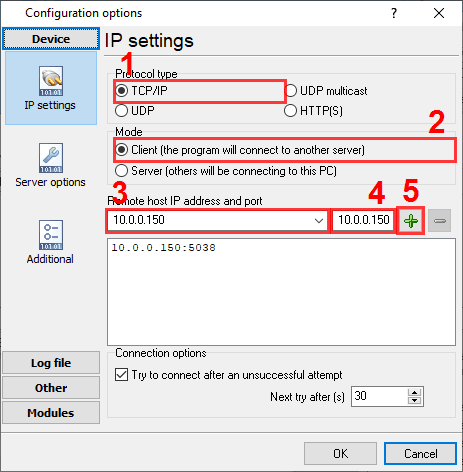
2. Select the corresponding data query and parser plugin.

3. Click the "Setup" button near the "Data query" box.
4. Specify your login and password.
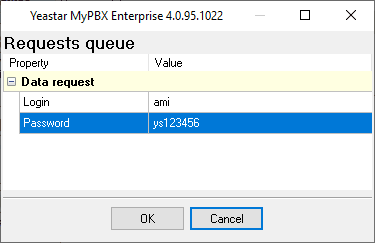
5. Clock "OK" and save all changes.
Selecting the correct parser for Yeastar MyPBX Enterprise
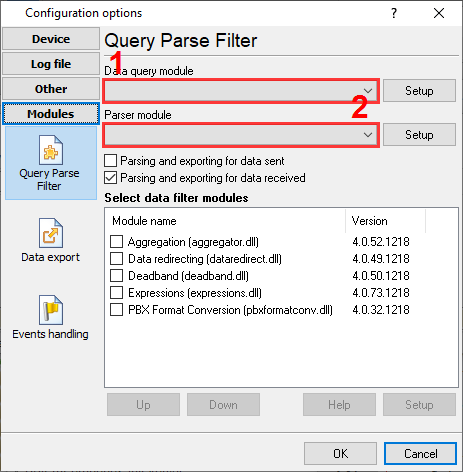
Yeastar MyPBX Enterprise
Yeastar MyPBX Enterprise
Data items
| Description | Data type | Column name |
|---|---|---|
| Account code | string | ACC |
| Destination number | string | DIALED_PHONE |
| Caller ID Name | string | FLAG1 |
| Caller number | string | CALLER_PHONE |
| Call type | string | CALL_TYPE |
| Direction | string | DIRECTION |
| Trunk | string | TRUNK |
| Ext | string | EXT |
| Call time | datetime | CALL_TIME |
| Call duration (sec) | integer | CALL_DURATION_S |
| Call duration | datetime | CALL_DURATION |
| Total duration (sec) | integer | TOTAL_DURATION_S |
| Ring duration (s) | integer | RING_S |
| Ring duration | datetime | RING |
| Call ID | string | FLAG2 |
Sample record
As delivered by the system; phone numbers, names and public addresses are masked.
Event: Cdr
Privilege: cdr,all
AccountCode:
Source: "Name"
Destination: 004xxxxxxxx(from 304)
DestinationContext: DLPN_DialPlan304
CallerID: "Name" <Name>
Channel: SIP/304-000xxxxe
DestinationChannel: DAHDI/32-1
LastApplication: Dial
LastData: DAHDI/g21/040xxxxxxx,,tTkKWwXx
StartTime: 2014-12-30 09:42:36
AnswerTime: 2014-12-30 09:42:39
EndTime: 2014-12-30 09:43:31
Duration: 55
BillableSeconds: 52
Reports and a database
Once records arrive, the logger writes them to a text file or to any ODBC database in real time, or hands them to the PBX Reports utility for manual, scheduled and e-mailed reports with a built-in web server. See exporting call log data to a database for the database setup.
Related Yeastar systems
Yeastar (S100,S200,S300)Wypoint
eOn Millennium v1.2
eOn Millennium
All supported PBX systems
Note: Products and companies mentioned here are used only for definition and identification purposes and can be trademarks and/or registered trademarks of the respective companies.
Related topics: Advanced PBX Data Logger
hereCall logging Call accounting SMDR to SQL SMDR Listener Cables and signals