
Siemens Hipath 4000 (CDR Standard Format)
This data is being extracted with help of the "Advanced PBX Data Logger" software only. It may not be applicable for other software titles.
Configuring PBX settings
Note: There is a lot of configuration options on Hipath 4000 for CDR. The following AMOS' are used (and more besides but these are the main ones):
- DAGR - sizes of files for storage.
- FEACG - circular or stop of records on hard disk.
- DAVF - currency on output.
- GEFE/GRZU - carrier selection.
- FBTN - assign numbers to each trunk that you wish to be shown in the output.
- GEZU - output to which device.
- SELG - what mask is used for outputting to what device and for what calls.
- SELS - the output on/off/collect.
- TLZO - output of a dummy number for incoming/outgoing/internal calls.
- FTBL - the main area where the output 'mask' or line of text is decided, normally one for incoming and one for outgoing.
- TEXT - the textual outputs that you are going to use for different occurrences on the system.
If you have access to a working system where the call charging is setup then you might be able to copy out the relevant information, however we would recommend that you contact your service provider and get them to turn it on for you.
USE COMMANDS BELOW AT YOUR OWN RISK!
Activate CDR output
Connect to your PBX using your admin console
Type in DIS-LSSM; It will show you what is active or not. If there is nothing showing up on the CDR port 1202 then DIS-SELS; Which ever one is set to ON example 1 then
DEA-SELS:1;
ACT-SELS:1;
Then display again DIS-LSSM;
Configuring PBX settings (advanced)
Configure output device
ADD-GEZU:TTY,DEV2,TTY,TERM2;
Activate output capture subroutines
ADD-FEACG:CDRCDUMP&CDRCDIS;
Configure CDR format
REGENERATE-FTBL:1;
ADD-FTBL:1,B,FORM,1,N,"## #@/#@/#@ #@:#@ #@:#@:#@ ####@ #@@@@@@@@@@@@@@ #";
ADD-FTBL:1,B,FORM,2,N,"@@@@@@@@@@@@@@@@@@@@@ #@@@@@@@@@@@@@@ #@@@@ #@@@ #";
ADD-FTBL:1,B,FORM,3,N,"@@@ #@@@@@ #@@@@@@@@@@@";
ADD-FTBL:1,B,CTRL,4,N,CR;
ADD-FTBL:1,B,CTRL,5,Y,LF;
ADD-FTBL:1,B,FIELD,1,SERVICE,CHAR,"0",L;
ADD-FTBL:1,B,FIELD,2,STNID,CHAR,"0",L;
ADD-FTBL:1,B,FIELD,3,STMONTH,CHAR,"0",R;
ADD-FTBL:1,B,FIELD,4,STDAY,CHAR,"0",R;
ADD-FTBL:1,B,FIELD,5,STYEAR,CHAR," ",R;
ADD-FTBL:1,B,FIELD,6,STHOUR,CHAR,"0",R;
ADD-FTBL:1,B,FIELD,7,STMIN,CHAR,"0",R;
ADD-FTBL:1,B,FIELD,8,CONHOUR,CHAR,"0",R;
ADD-FTBL:1,B,FIELD,9,CONMIN,CHAR,"0",R;
ADD-FTBL:1,B,FIELD,10,CONSEC,CHAR,"0",R;
ADD-FTBL:1,B,FIELD,11,COPIN,CHAR," ",L;
ADD-FTBL:1,B,FIELD,12,DESTPID,CHAR," ",L;
ADD-FTBL:1,B,FIELD,13,EXPENS,CHAR," ",L;
ADD-FTBL:1,B,FIELD,14,SUPLSERV,CHAR,"0",L;
ADD-FTBL:1,B,FIELD,15,CALLIPTY,CHAR," ",L;
ADD-FTBL:1,B,FIELD,16,DESTPTY,CHAR," ",L;
ADD-FTBL:1,B,FIELD,17,RTIONPTY,CHAR," ",L;
ADD-FTBL:1,B,FIELD,18,ROUTCN,CHAR," ",L;
ADD-FTBL:1,B,FIELD,19,TKNOREAL,CHAR," ",L;
ADD-FTBL:1,B,FIELD,20,INTNREAL,CHAR," ",L;
ADD-FTBL:1,B,FIELD,21,ACCTCODE,CHAR," ",L;
ADD-FTBL:1,B,FIELD,22,PIN,CHAR," ",L;
Configure Select Group
The following commands configure CDR logging for incoming, outgoing and internal calls
DEL-SELG:1;
ADD-SELG:SELG,1,N,DEV2,NODEV,1,0;
CHANGE-SELG:SELT,1,1,FORM01,NOFORM,NOCALC,"A22",,,,,,,,,, ,,,,,,,,,,,,,,,,,,,,,,,;
CHANGE-SELG:SELT,1,1,,,,,0&&999999,,,,,,,,,,,,,,,,,,,,,,, ,,,,,,,,,;
CHANGE-SELG:SELT,1,1,,,,,,VOICE,,,,,,,,,,,,,,,,,,,,,,,,,, ,,,,,;
CHANGE-SELG:SELT,1,1,,,,,,,0&&15,,,,,,,,,,,,,,,,,,,,,,,,, ,,,,,;
CHANGE-SELG:SELT,1,1,,,,,,,,ALL,ALL,N,N,Y,N,N,N,N,N,N,N,N ,N,N,N,N,N,N,,,,,,,,,,,;
CHANGE-SELG:SELT,1,1,,,,,,,,,,,,,,,,,,,,,,,,,,,0,000001,, ,,,,,,,;
CHANGE-SELG:SELT,1,1,,,,,,,,,,,,,,,,,,,,,,,,,,,,,0&&999,0 &&254,0&&30,,,,,,;
CHANGE-SELG:SELT,1,1,,,,,,,,,,,,,,,,,,,,,,,,,,,,,,,,N,N,INTERN&INCO&OUTG,0&&8,0&&9,ALL;
Activate Select Group
ACT-SELS:1;
Connecting to the PBX
Default IP address: 192.0.2.3
Default IP port: 1202
The compputer with our logger should be in the same sub-network.
You should see the ##### banner and then call charging in the logger's windows.
Configuring PBX Data Logger as a TCP client
Our software should work in the TCP client mode. It means that our software will initiate connection with the PBX and the PBX will work as a server. Add one or several PBX IP addresses here (the IP address of the Siemens Hipath 4000 [CDR Standard Format]). The port number should match the port that you have defined within the PBX (1202 in the example below).
1. Add a new configuration with the TCP data source (if you didn't it before).
2. Configure the TCP settings as shown below.
![TCP Client Mode - Siemens Hipath 4000 [CDR Standard Format]](/pbx/shared/tcp-client-mode.png)
192.168.1.220
1202
192.168.1.220:1202
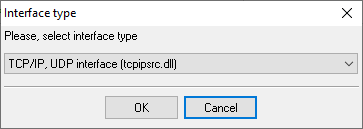
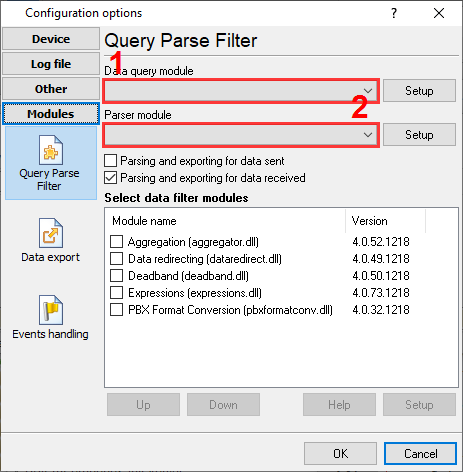
Selecting the correct parser for Siemens Hipath 4000 (CDR Standard Format)
Siemens Hipath 4000 (CDR Standard Format)
Siemens Hipath 4000 (CDR Standard Format)
Data items
| Description | Data type | Column name |
|---|---|---|
| Service | string | FLAG1 |
| Station ID | string | FLAG2 |
| Call time | datetime | CALL_TIME |
| Call duration | datetime | CALL_DURATION |
| Call duration (s) | integer | CALL_DURATION_S |
| Class of PIN | string | FLAG3 |
| Destination party ID | string | FLAG4 |
| Expensive connection | string | FLAG5 |
| Supplementary service ID | string | FLAG6 |
| Call type | string | CALL_TYPE |
| Direction | string | DIRECTION |
| Ext | string | EXT |
| Route code | string | FLAG7 |
| Caller phone | string | CALLER_PHONE |
| Dialed phone | string | DIALED_PHONE |
| Trunk | string | TRUNK |
| Account code | string | ACC |
Interested in reports for PBX usage?
With our PBX Reports utility, you get manual, scheduled, and email reporting options, a built-in web server, and other functionalities. Set up your call accounting for Siemens Hipath 4000 (CDR Standard Format). Check our PBX Reports utility.
Want PBX call logs in a database?
Real-time capture and export of SMDR or CDR data to your database is a standard feature of the logger. Check our article about call logging to a database.
Siemens Hipath 4000 related connection settings
Siemens Hicom-350HSiemens Hicom-300H
Siemens Hipath 4000 (CDRE)
Siemens Hipath 4000
Quick jump to the connection settings for other PBXs or connection formats ↴
Note: Products and companies mentioned here are used only for definition and identification purposes and can be trademarks and/or registered trademarks of the respective companies.
Related topics: Advanced PBX Data Logger
hereCall logging Call accounting SMDR to SQL SMDR Listener Cables and signals