
Write NMEA data to a database (using MS Access in this example)
Problem:
To write data from a GPS receiver to a navigation database (for example, Microsoft Access).
Preliminary requirements:
- Advanced NMEA Data Logger Enterprise, or a trial version (download).
- ODBC Database data export module.
- Configure data acquisition from equipment that provides data compliant with the NMEA 0183 format (the NMEA 2000 format is not supported). The received data should be displayed in the application's main window.
Solution:
Step 1. Configure the parser
Select the NMEA packets that you need from the supported packets list in the parser. To do that:
1. Open the configuration dialog box (Options → Manage configurations → Your configuration → Modify).
2. Switch to the "Modules → Query Parse Filter" tab (Figure 1).

Figure 1: The parser module
3. Click the "Setup" button next to the "NMEA data parser" item.
4. When a dialog box appears (Figure 2), select the packet types, you need to process and export.

Figure 2: Data packet types
Important: Select only the packet types that you need to avoid exporting unnecessary data.
On the "Common" tab (Figure 3), we recommended adding the selected packet types to the data aggregation list. Please note that a device type identifier must be specified, too (in addition to a packet type identifier). RMC → GPRMC. Packets are received one by one and processed sequentially, so enabling data aggregation helps to prevent empty fields in the database.

Figure 3: Data packet aggregation
6. Save the changes by clicking the "OK" button.
Step 2. Check the parser and view the received data
At this step, make sure that the parser works correctly. To do that, you can use the "DDE server" module included in the standard installation package. To check the parser:
1. Enable the "DDE server" module on the "Data export" tab (Figure 4).

Figure 4: The data export module
2. Save the changes by clicking the "OK" button. The new module will be loaded and launched. Open the dialog box with data export modules again and double-click on the "DDE server" item.
3. When a dialog box appears (Figure 5), switch to the "All active items" tab.
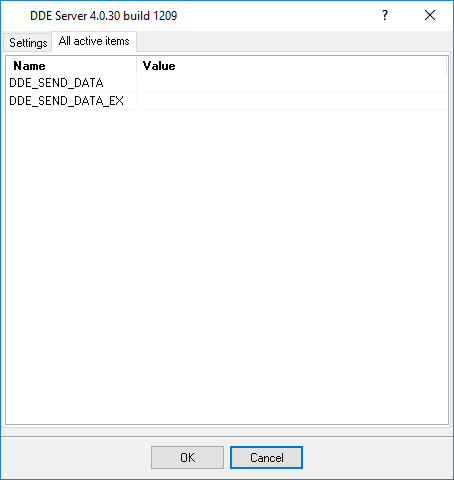
Figure 5: DDE server
4. Wait for incoming data packets that you selected in the parser. If you enabled data packet aggregation in the parser, please wait for the packets of both types to be received.
5. In the active items list, variables with decoded values will appear (Figure 6). As you can see, even two packet types can provide a lot of decoded values. You might want to write only certain values to the database. In this case, please remember the names of variables that you want to use. In the data export module, each variable will be written to its own column in the database.
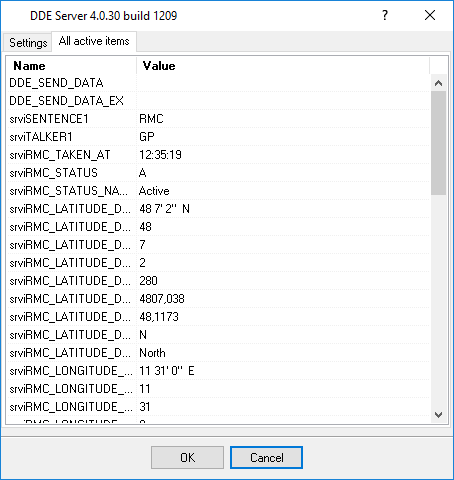
Figure 6: Parser variables
Note: The "srvi" prefix is used for variables in the "DDE server" module only. In any other modules, variable names do not have this prefix.
If you do not see any variables in the list, make sure that:
- You have selected the data packet types that you need.
- Only the packet types that you selected in the list are aggregated.
- The data received are compliant with the NMEA 0183 format. Here is an example of correct NMEA 0183 packets:
$GPRMC,123519,A,4807.038,N,01131.000,E,022.4,084.4,230394,003.1,W*6A
$GPGLL,3907.360,N,12102.481,W,183730,A*33
Step 3. Configure data export to a database
In this example, the "ODBC Database" module will be used to write data to the database (Figure 7). First, create a database with the necessary structure, as the application cannot create it automatically. In the database, manually create a table for your data. The database from this example you may download here. Then do the following:
1. Enable the data export module and double-click its name.

Figure 7: The module for writing data to the database
2. When a dialog box appears, enable writing to the database by selecting "Write new data to a database" (Figure 8).

Figure 8: Enable writing to the database
3. On the "Connection" tab (Figure 9), configure the connection to the database.
4. If you cannot find your database in the dropdown list, use the ODBC Connection Manager to create and configure the system data source (System DSN). Then close the ODBC Connection Manager and click the "Refresh" button.
5. Select your database in the dropdown list. For a Microsoft Access database, you also need to specify a full path to the database file (Figure 9).

Figure 9: The module for writing data to the database
6. Switch to the "Binding" tab (Figure 10), and click the "Import" button to import the description of your table from the database.

Figure 10: Binding variables and columns in the table
7. For each column, specify a parser variable. You can select most variables from the dropdown list. If the list does not contain a variable that was present in the active items list in Step 2, you can enter the variable's name manually.
8. In the list, delete any columns that you don't need to write data to. For example, you can delete a field of the Counter type or a field that is filled with a default value.
9. Click the "OK" button to save the changes. From now on, each time new data are received, they will be immediately written to the database.
The final configuration of the data export module you may load from this file using the "Load & Save" button.
The final configuration of the whole test environment you may load from this file using the "File → Restore backup" menu item in the main window.
Related articles: Write NMEA data to a database (using MS Access in this example)
- FAQ.
- Get NMEA GPS and Sounder data through the OPC interface.
- Write NMEA data to a database (using MS Access in this example).
- Export AIS data to a database.
- Export all received AIS or NMEA data to XML or a text file.
- Saving NMEA or AIS data to a Microsoft Excel file (CSV format).
- Saving selected NMEA values to an Excel file (CSV format).
- Grouping NMEA data from two data sources to one row in a CSV file.
- Grouping NMEA data from two data sources with different communication parameters.
- Decoding AIS files (batch AIS files processing).
Related topics: Advanced NMEA Data Logger
hereSerial port interface RS232 pinout and signals Cables and signals Data monitor cables